First up on the back construction is the placket opening. For this particular pattern, the back is one large piece the width of the fabric. It is attached to the back yokes, so a placket opening is needed for the back opening. I start by marking a tall skinny "V" at the center back. This one is 5" deep:

Then I stitched about 1/4" inch away down side, tapering to a point at the bottom, pivoting, and stitching back up the other side. Then I cut down the center of the "V", being careful to cut to the point of the "V", but not through the stitching:

I cut a placket strip 1 1/4" wide and 10 1/2" long--you'll notice that this is twice as long as the original cut (5 inches) plus half an inch. I spread the "V" open and stitched it flat to the placket strip, pressed it, and pressed under 1/4" on the other long edge. Just for good measure I always stitch over the bottom of the "V" part twice:

Then I turned the placket and pinned it in place.

I steamed it really well so it would stay in place when I removed the pins. I flipped it right side up and stitched exactly in the ditch from the right side, making sure I caught the bottom of the placket as I stitched. An action shot!
The finished placket from the inside:

It took longer to take the pictures than it did to make the placket.
The Back Yokes
Now for the back yokes.
Each back yoke piece is cut on the fold. This is a great technique because it makes a much smoother center back opening edge and eliminates the separate facing piece for the back yoke. Why does this matter? Because having a center back seam allowance can give you great pain when it is time to make buttonholes, that's why. The fewer seams on a buttonhole/button edge, the better. A seam allowance keeps the buttonhole foot from sitting flat and gripping the fabric.
Each back yoke piece is cut on the fold. This is a great technique because it makes a much smoother center back opening edge and eliminates the separate facing piece for the back yoke. Why does this matter? Because having a center back seam allowance can give you great pain when it is time to make buttonholes, that's why. The fewer seams on a buttonhole/button edge, the better. A seam allowance keeps the buttonhole foot from sitting flat and gripping the fabric.
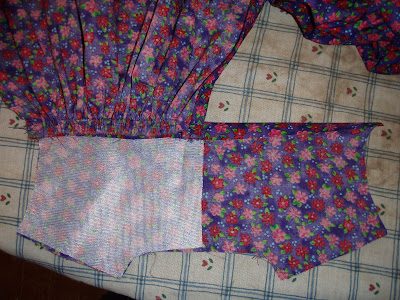
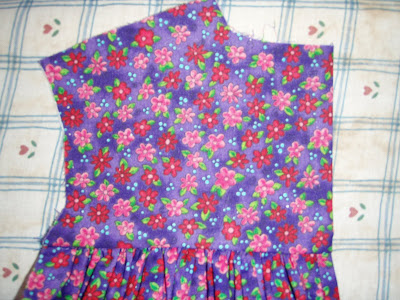
I gathered each side of the back skirt pieces and sewed them to the back yokes:
You can see half of the back yoke--the rest of it is hanging off the edge. Here's another shot, for those who like to stand on their heads. You get the idea.
Rant Coming Up!
You probably noticed that I used interfacing on half of the back yoke. I did this on both sides, being careful to interface the side I was attaching the skirt to. Why a Rant? Because I have yet to see a "Heirloom" pattern that tells you to use interfacing! If you haven't been sewing for ages, somebody needs to tell you to use this! If you're charging $12.00 a pop for a pattern, I expect full directions--no skimping!
I use lightweight fusible knit on just about everything because it somehow manages to be firm yet pliable at the same time. It has never gone stiff on me. It bonds easily and permanently (I could offer you a photo of the soleplate of my iron as proof) and provides just the right amount of support for the buttons and buttonholes! If your finished garment doesn't hang well or sags at the openings, use interfacing! Our goal is handmade, NOT homemade! Rant over.
Back to the sewing. Now I fold the back yoke over on itself, enclosing the skirt:
I line up the seam allowances, and stitch again through all three layers--facing, skirt, yoke--following the original stitching line:
I trim it. I trim it way down--between 1/8" and 1/4". Remember what I said about seam allowances in the buttonhole area? When I flip this out, this seam allowance will be entirely encased, never to be seen again, never to be allowed to ravel, never to be exposed--so I can really Trim It!


2 comments:
if only Vogue had made it look this easy. I sweated that back for a long time on the pink daisy dress. It is a nice way to do it.
I went to bed late thinking about the back of PP. I woke up early thinking aboutit. I never considered trimming the seam allowance to avoid button hole troubles, which I always have there! I'm learning.
Beautiful nails.
Post a Comment