One, it was an empire style bodice. Two, the bodice appears to fit fairly close to the body (I'll know for sure once I sew it up, since we all know that you cannot always rely on pattern drawings). Three, it has a little sleeve that should fit into the existing armhole. Although I'm not using sleeves on Twirl, if I can get this bodice drafted like I want it I have other plans that do involve sleeves.
So here we go.

Here are the bodice front and back in their original state. The pattern calls for a center back zipper, but I'm using buttons.

The first step is to trace off the original pattern and draw in the original cutting lines. I drew in the original center back seamline and I marked the straight grain of fabric. I measured the original side seams to see if they were the same length. They weren't. So I marked in the pattern correction for that. It is imperative that the side seams be equal in length. I used a brown marker, just for you!

Since I want to add small tucks to the bottom of the front bodice and I want to add gathers to the back bodice, I marked the center of each piece and drew in three slash lines one inch apart. I don't want to interfere with the armhole, so I ended the slashes just below the armhole.

Now I slashed the front bodice on the slash lines. I am not afraid. It's only paper. I pinned down the parts of the pattern that I don't want to move. Then I spread the slashes to add width for the tucks, taping down the adjustment as I worked:

You can see that this causes the pattern to crease. It's trying to tell me something.

It wants to be slashed. So I go along....
Then I let it flatten itself out again:
This changes the angle of the side seam. Since the fabric will be flat, the pattern must be flat, too. So I draw in the new side seam with a blue marker, and sketch in the seamlines with green:
The final step is to redraw the curve on the bottom of the bodice and lengthen the side seam back to its original length. Viola!
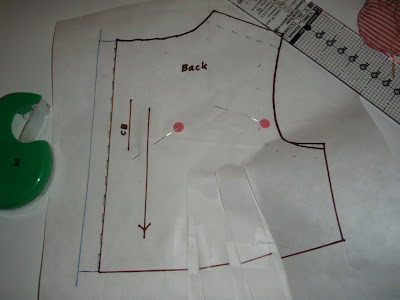
I followed the same procedure with the back bodice. The only difference here is that I added 5/8" to the center back cutting line to accomodate those cute little buttons I'm adding:
Here are the progress pictures for the back:
I followed the same procedure with the back bodice. The only difference here is that I added 5/8" to the center back cutting line to accomodate those cute little buttons I'm adding:
Here are the progress pictures for the back:
Now to cut this out of muslin and baste it together for a first fitting on The Princess.


No comments:
Post a Comment